We’ve come a long way in this 8-part series on how to take a good photo on iPhone, and I hope you’ve been having fun trying out all the tips. By now, you’ve learned about lighting, framing, Portrait mode, timers, and more—but even with all that, sometimes a photo just needs a little extra polish. That’s where fun part comes in.
In this final post, I’m going to show you some simple iPhone editing tools that can brighten, crop, and fine-tune your shots so they really shine. Your iPhone has some super handy editing tools built right in, and with just a few taps, you can brighten, crop, straighten, and tweak your photos so they really pop. I’ll keep it simple and show you how to get impressive results in no time.
👈If you missed: iPhone Photo Tip #7: Use the Timer for Better Photos
How to Edit A Photo on iPhone
Let’s begin with the basics. To edit any photo, tap on the Slide Bar icon in iOS 18, (pictured below) or Edit button in iOS 17. From there you can see all the edit options. Let’s begin with the simplest way to edit a photo, Auto Adjust.
Auto Adjust
Most of the time, your iPhone can make a photo look better with just one tap. The Auto Adjust option (the little magic wand), instantly improves lighting and color — and for many photos, that’s all you need.
")
The Auto Adjust is great but, sometimes you’ll want to take it a step further. Maybe the picture is still a little dark, or the colors don’t look quite right. That’s when you can use the other editing tools.
The editing tools that are available vary depending on the iPhone you have and the iOS version, so to keep things simple, here’s a quick guide to the most common edits.
Quick Guide for Common Edit Options
| What you want to do | Option to use | Notes |
|---|---|---|
| Let iPhone fix it for you | Auto Adjust | You can can do more edits after Auto Adjust or reset back to the orginial photo. |
| Make photo brighter or darker | Brightness / Exposure | Slide left/right to fine-tune. |
| Fix colors that look “off” | Vibrance / Saturation | Warmer = more yellow/red, Cooler = more blue. |
| Blur or sharpen background (Portraits) | Depth / Lighting | Only appears on Portrait Mode photos. |
Erase objects or people in photo | Clean Up | Only available on on iPhone 15 Pro, Pro Max, and 16 models with iOS 18. Swipe over what you want to erase and iPhone does it for you. |
Crop or Straighten a Photo
One of the easiest ways to improve how to take a good photo on iPhone is by cleaning it up with a quick crop. Cropping gets rid of distractions, straightens tilted horizons, and can even help you reframe the picture so the subject really shines. And the best part? It’s simple and totally reversible.
Here’s the quick way:
- Open your photo and tap the Slider Bar button at the bottom of the photo, ( Edit for iOS 17).
- Select the Crop tool (the square with arrows around it).
- Drag the handle edges to manually crop.
- Tap Straighten slider to fix a crooked shot.
- Tap the Rotate button (square with a curved arrow, top left) to turn the photo 90° at a time.
- Tap the Flip button (triangle with arrows, top left) to mirror the photo left to right.
✨ Pro tip: Sometimes you may notice an Auto button at the top of your photo when you’re cropping. That’s your iPhone suggesting a better framing. It doesn’t show up for every photo — only when your iPhone thinks there’s room for improvement.
")
That’s it! Easy, fast, and non-destructive (meaning you can undo it anytime).
But what if you need a specific size of your photo, say for a website profile picure. That’s where aspect ratio comes in and your iPhone can do that too.
Resize Your Photos Aspect Ratio
Copping doesn’t have to stop at trimming the edges. Your iPhone gives you a bunch of ratio options that can totally change the feel of your picture — and even make it the perfect fit for your lock screen or social media feed.
👉 Quick note: “Aspect ratio” just means the shape of your photo — whether it’s more square, wide, or tall.
Here’s what you’ll see when you tap the Aspect Ratio button in the Crop tool:
- Original – Keeps the photo’s natural size.
- Vertical or Horizontal – Quickly reframe for portrait or landscape.
- Freeform – Drag the crop box however you like.
- Square – Ideal for Instagram posts or profile pictures.
- Wallpaper – A super handy way to size your photo so it fits your iPhone background without cutting off the important parts.
- Other Ratios – From 16:9 to 4:3, perfect for cinematic shots or sharing photos in the best format for Facebook, X, or other platforms.

👉 Want to post your photo online? Here’s a quick guide to the aspect ratios most social apps love:
- Instagram Feed – Square (1:1) or Vertical (4:5) works best.
- Instagram Stories & Reels / TikTok – Full vertical (9:16).
- Facebook Cover Photo – Wide (16:9).
- YouTube Thumbnail – 16:9 for that cinematic look.
With just a couple of taps, you can reshape your photo for framing, social media posts, or even your next wallpaper.
Editing Live Photos
Sometimes even with all the tips we’ve covered, you still end up with a blink, a blur, or just not the best moment. That’s where Live Photos can really save the day. The best part about Live Photos isn’t just that little motion clip—it’s the ability to choose a different key photo. With a quick edit, you can swap out that blink for a smile or grab a sharper frame, making it a handy trick in learning how to take a good photo on iPhone.
But let’s be clear, not all photos are Live photos. Let’s look at how to tell if you took a Live photo next.
Is My Photo a Live Photo?
Before we start swapping frames, you’ll want to make sure you’re actually working with a Live Photo. Here’s how to check:
- Look for the Live icon – when you open a photo, you’ll see a small “LIVE” label at the top left of the screen if it’s already a Live Photo.
- Turn on Live Photos if needed – when taking a new shot, tap the Live icon (a set of concentric circles) at the top of the Camera app. If it has a line though the circles then Live is off.
Once you know you have a Live Photo, you can take advantage of the magic: swapping out the key photo, trimming the motion, or even turning Live off if you just want a still shot
How to Edit a Live Photo
Open the Live Photo you want to edit, tap the bottom Slide Bar, (Edit for iOS 17)
- To Swap the Key Photo
- Tap the Live Photo icon at the bottom.
- Scroll through the frames and choose the one that looks best.
- Tap Make Key Photo to set it as your main still.
- Tap Done.
- To Trim the Motion
- Drag the handles on either end of the timeline to cut out extra movement.
- Tap Done when you’re happy.

✨ Pro Tip: Even if the Live Photo captures motion, don’t worry about choosing the “perfect” key frame. Play around—you can always go back and change it later. This makes it one of the easiest ways to improve a photo you already took.
Fun with Filters & Styles
Once your photo is looking good with basic edits, you can have a little fun and give it a creative touch. That’s where Filters (on older iPhones) and Styles (on iPhone 16 models) come in. They let you change the mood of your photo in just a tap.
Here’s what you need to know:
- Where to find them
- Open your photo and tap the bottom Slider Bar, ( Edit for iOS 17).
- On an iPhone 16, it defaults to the Styles option,
- On all other models, look for the Filters icon in the middle of the bottom row (three overlapping circles).
- Filters vs. Styles
- Filters (older iPhones like iPhone 11) offer classic looks like Vibrant, Dramatic, or Mono.
- Styles (iPhone 16 models) adjust the tone, contrast, and color in a way that feels more like a “preset style” rather than just a color filter.
- Photo types matter
- Standard photos & Live Photos: You can use Filters or Styles.
- Portrait photos: You won’t see Filters or Styles; instead, you’ll get Portrait Lighting options and the Depth slider.
- Apply & tweak
- Tap a Filter or Style to preview it.
- You can use the intensity slider to dial it up or down until it feels right.
- Tap Done when you’re happy.
✨ Pro Tip: Don’t be afraid to experiment! Changing the style can completely change the mood of your photo, and since edits are non-destructive, you can always go back and try a different look.

Wrapping Up the Series
And that’s a wrap on my iPhone Photo Tips series! Over the past few weeks, I’ve covered everything from getting better shots in low light, to making Portrait mode pop, to using a timer for better group photos. Now, with these simple editing tools, you’ve got the full toolkit to take photos you’ll be proud of.
If you missed any tips (or just want to revisit them), here’s the full series in order:
iPhone Photo Tip #1: Natural Light for Brighter, Better Shots
iPhone Photo Tip #2: Great Low-Light Photos
iPhone Photo Tip #3: Use the Grid for Better Framing
iPhone Photo Tip #4: Lock Focus and Brightness for Better Photos
iPhone Photo Tip #5: Make Photos Stand Out with Portrait Mode
iPhone Photo Tip #6: Get the Full Picture with Pano Mode
iPhone Photo Tip #7: Use the Timer for Better Photos
What’s Next?
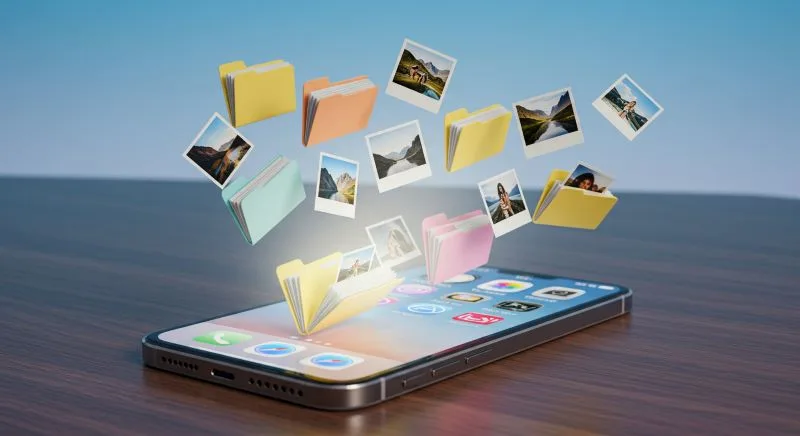
✨ Now that you’ve learned how to take and edit great photos, the next step is keeping them organized. After all, what’s the point of amazing shots if you can’t find them later? Don’t worry—I’ve got you covered with a couple of posts that walk you through it step by step:
How to Organize Photos on iPhone: Simple Tips Part 1
How to Organize iPhone Photos: Simple Tips Part 2
That way, your Photos app will be just as neat and polished as your pictures.
📸 I’d love to know—which of these tips has helped you the most? Maybe you’ve tried Portrait mode for the first time, or discovered how handy the timer is for group shots. Share your favorite in the comments or even post a photo you’ve taken after trying a tip.
And if you’ve enjoyed this series, stick around! I share new iPhone guides, tricks, and step-by-step tips every week. Subscribe below and follow me on Facebook and Instagram so you never miss out.

Gail Kerr
IT Professional and Technical WriterTechnology has been part of my life for as long as I can remember. With over 27 years of experience providing computer support in both large corporations and small businesses, I’ve seen just about everything. In 2009, I went back to school to earn an Associate Certificate in Technical Writing—combining my love of tech with a passion for clear, easy-to-understand communication. Now, I help people of all levels feel more confident with their devices. I’ve also become the go-to person for friends and family whenever a tech question or challenge comes up.