In Tip #1, I talked about how natural light can make a big difference in your iPhone photos. But what about those times when the light isn’t great—like indoors in the evening, at a family gathering, or sitting outside after sunset?
For a long time, I assumed low-light photos were always going to be a little disappointing. They were often blurry, dark, or washed out by the flash.
Thankfully, iPhones have come a long way over the years. Features like Night Mode make it possible to capture surprisingly good photos even when the light starts to fade.
I’m definitely not a photography expert. But after years of taking photos with my iPhone, these are a few simple things I’ve found that help when the light starts to disappear.
Affiliate Disclosure: This post contains affiliate links. If you click through and make a purchase, I may earn a small commission at no extra cost to you. I only share products I think could be helpful to you.
👈 Missed iPhone Photo Tip #1: Natural Light for Brighter, Better Shots?
Let Night Mode Do the Work
For years, my solution for low-light photos was simple: turn on the flash.
That worked on older phones, but somewhere along the way I realized I wasn’t using flash nearly as often anymore. In fact, most of the time my photos looked better without it.
That’s because newer iPhones have a feature called Night Mode. When your iPhone detects low light, Night Mode turns on automatically and starts working behind the scenes to brighten the image while keeping it looking natural.
If you’ve never noticed it before, look for the small moon icon that appears near the top of the Camera app when you’re taking photos in low light. You may also see a number beside it showing how many seconds Night Mode needs to capture the image.

The first time I noticed it, I wasn’t even sure what was happening. I just realized my iPhone was taking a little longer to capture the photo than usual. That’s because Night Mode needs a moment to gather more light before taking the picture.
One thing I’ve learned is that patience helps. When you see the moon icon appear, try to hold your iPhone as steady as possible until the photo is finished. If you move too quickly, the photo can end up blurry.
You don’t need a tripod or special equipment for most situations. Simply holding your iPhone steady for a few seconds is often enough.
The next time you’re taking photos in low light, resist the urge to turn on the flash. Let Night Mode do its thing and see what happens. You might be surprised by how much detail your iPhone can capture on its own.
Let Your iPhone Adjust the Light
Even with Night Mode, there are times when your photo doesn’t look quite the way you want it to. Maybe the subject is too dark, or maybe a nearby light is making everything look brighter than it should.
That’s when I use one of my favorite iPhone camera tricks.
Before taking the photo, tap on the part of the screen you want the camera to focus on. A small yellow box will appear around the area you tapped.

Once you’ve tapped to focus, you’ll also see a small sun icon beside the box. Slide your finger up to brighten the photo or down to make it darker.
I especially love using this trick when photographing the moon. I take a lot of moon photos, both during the day and at night. If I simply point my iPhone at the moon and take the picture, it often ends up looking like a bright white circle with very little detail.
By tapping on the moon and sliding the exposure down, I can usually capture much more detail and make the photo look closer to what I was actually seeing. It’s amazing how much difference one small adjustment can make.
")
The best part is that you can see the change before you take the photo. If it doesn’t look right, keep adjusting until you’re happy with the result.
This is one of those built-in iPhone tools that’s easy to overlook, but once you know it’s there, you’ll find all kinds of situations where it comes in handy.
In Tip #1, I used this trick to avoid blown-out highlights when shooting in strong sunlight. Here, it helps bring out more detail in dim lighting—without using flash. Same move, different lighting!
Things You Can Do to Take Better Low-Light Photos
So far, we’ve looked at some of the built-in tools that can help your iPhone take better photos in low light. Features like Night Mode and exposure adjustment do a lot of the work for you.
But there are also a few simple things you can do that can make a big difference. None of them require special equipment or photography experience. They’re just small habits I’ve found helpful when taking photos after dark or in dim lighting.
Look for Available Light
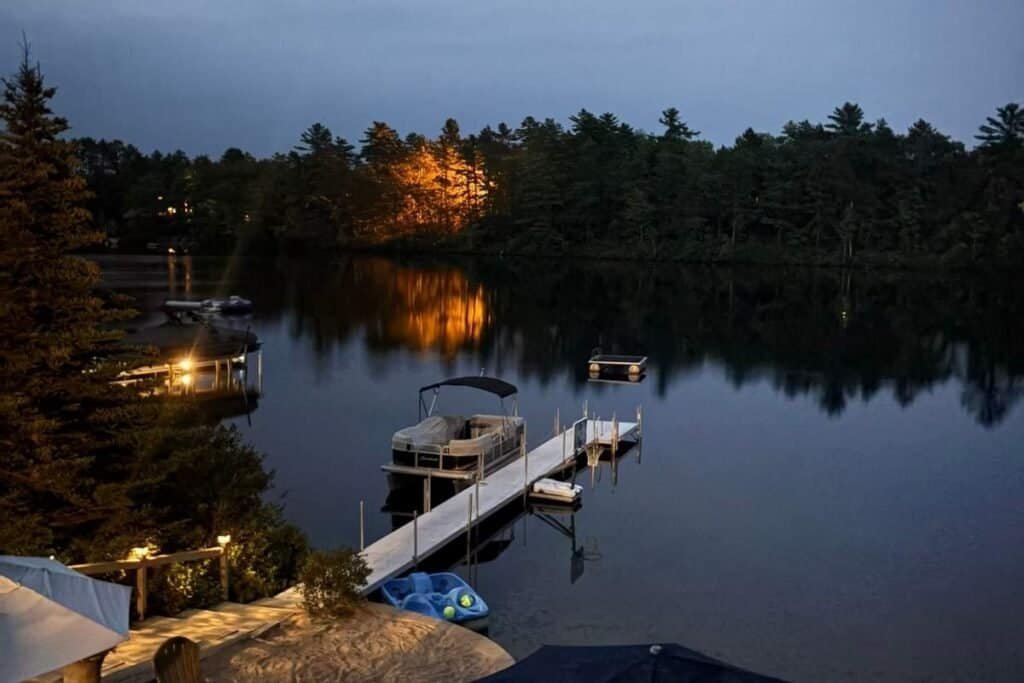
Just because it’s dark doesn’t mean there isn’t any light.
One thing I’ve noticed is that low-light photos usually turn out better when there’s at least a little light for the iPhone to work with. That doesn’t mean you need bright sunshine or even daylight. Sometimes a porch light, a lamp, a campfire, or a nearby window is enough to make a difference.

When I’m taking photos in the evening, I often find myself paying more attention to where the light is coming from. If I can position myself or my subject a little closer to a light source, the photo almost always turns out better.
This is especially helpful when taking pictures of people. A small amount of light on a face can make the photo look brighter and more natural without needing to use the flash.
You don’t have to overthink it. Just take a quick look around and see if there’s a nearby light source that can help your iPhone capture a little more detail.
Take More Than One Photo
Low-light photos can be a little unpredictable. Sometimes one photo looks great, while the next one is blurry because someone moved or your hand wasn’t quite as steady as you thought.
That’s why I almost never take just one photo when the light is low.
If I’m photographing Willow, a family gathering, or a nice evening sky, I’ll usually take two or three shots instead of relying on a single picture. It only takes a few extra seconds, and it gives me a much better chance of ending up with one that I really like.

The nice thing about digital photos is that there is no cost to taking a few extras. If one photo turns out blurry or someone blinked at the wrong moment, you have other options to choose from.
I’ve found that this simple habit improves my photos more often than any camera setting ever could.
Keep Your iPhone Steady
Low-light photos take a little longer to capture because Night Mode needs time to gather light. That means even small movements can sometimes show up as blur in the final photo.
The nice thing is you don’t need anything special to deal with this.
Most of the time, I simply hold my iPhone as steady as I can and try to stay still for a few seconds while the photo is being taken. If I’m standing near a table or a wall, I’ll sometimes rest my elbows or lean in a little to help keep things steady.
Even something as simple as holding your breath for a moment can help more than you’d think.
If you do enjoy taking a lot of nighttime photos—especially things like sunsets, evening skies, or the moon—a small tripod can be helpful. It keeps your iPhone completely still while Night Mode does its work, which can make a difference when you’re trying to capture more detail.

I’ve found this especially useful when photographing the moon. On nights when I really want a clear shot, I’ll sometimes set my iPhone on a tripod and let it sit steady while the camera does its thing. It’s not something you need, but it can make those types of photos a little easier.
For everyday photos, though, your hands are usually more than enough.
Move Closer Instead of Zooming
Once your iPhone is steady, the next thing I pay attention to is how close I am to what I’m photographing.
In low light, it can be tempting to use zoom so you don’t have to move around. I used to do this all the time, especially when I first got an iPhone. But I’ve noticed the photo usually turns out better when I physically move closer instead.
Zooming in too much in low light can make photos look softer or lose detail. When I take a few steps closer, the iPhone has more light and detail to work with, and the result is usually much clearer.
That said, I’ve also learned there’s a difference between zooming in and using one of the iPhone’s built-in zoom levels. On my iPhone 16, for example, the 2x option gives a much cleaner result than pinching in manually. When I’m taking moon photos, I often stick with that 2x option because it keeps the detail much sharper than a regular zoom.

This is especially noticeable with things like the moon, streetlights, or evening sky shots. A small change in distance—or using a “clean” zoom level instead of pinching in—can make a big difference in how much detail the camera picks up.
Of course, you can’t always move closer, but when you can, it’s often the simplest way to improve the shot without changing anything else.
Try It Out Yourself
The next time you’re outside after sunset or sitting in a room with dim lighting, take a moment to try a few of these tips.
Instead of reaching for the flash, let Night Mode do its work. Tap to focus, adjust the exposure if needed, and hold your iPhone steady while the photo is being taken.

If the first photo isn’t quite right, take another one. Try moving a little closer or look for a nearby light source that can help brighten the scene naturally.
You don’t need perfect conditions or expensive equipment to take better low-light photos. Sometimes a few small adjustments are all it takes.
And if you happen to spot a beautiful moon tonight, don’t forget to give that exposure slider a try. You might be surprised by how much detail your iPhone can capture.
What’s Next?
We’ve spent the first two tips talking about light—first natural light, and now low-light photography. Next time, we’ll look at something completely different: how to frame a photo.
It’s a simple iPhone feature that many people don’t even realize is there, but once you turn it on, it can help you take more balanced and interesting photos.
👉Next up: iPhone Photo Tip #3: Use the Grid for Better Framing
👈If you missed Tip #1 iPhone Photo Tip #1: Natural Light for Brighter, Better Shots?
Going on a trip soon? It’s a great time to practice these tips! Check out my iPhone Tips for Travel to get your camera roll organized and ready for the memories you’ll want to keep.

Gail Kerr
IT Professional and Technical WriterTechnology has been part of my life for as long as I can remember. With over 28 years of experience providing computer support in both large corporations and small businesses, I’ve seen just about everything. In 2009, I went back to school to earn an Associate Certificate in Technical Writing—combining my love of tech with a passion for clear, easy-to-understand communication. Now, I help people of all levels feel more confident with their devices. I’ve also become the go-to person for friends and family whenever a tech question or challenge comes up.