So far in this series on how to take a good photo on iPhone, I’ve talked about lighting—first by using natural light, then by getting better results in low light without the flash. But good lighting is just one part of the picture!
This week, I want to show you how to frame your shot—and there’s a simple tool built right into your iPhone that can help: it’s called the grid.
👈If you missed Tip #2: iPhone Photo Tip #2: Great Low-Light Photos
How to take a good photo on iPhone using the grid
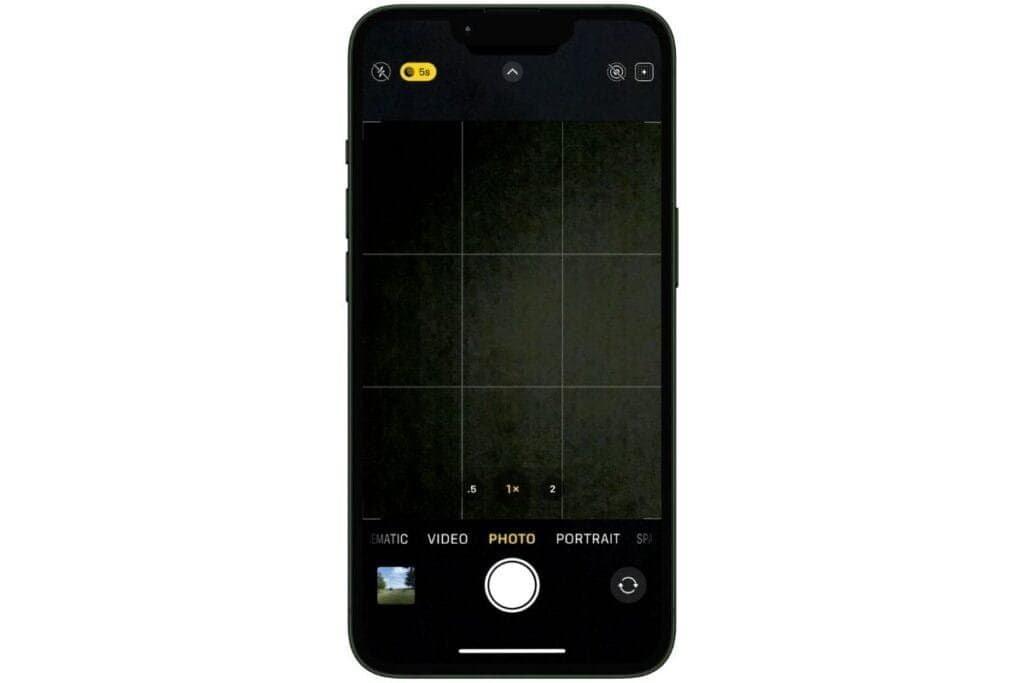
One of the easiest ways to take a better photo on your iPhone is to use the grid. It’s a simple setting that adds faint lines to your screen, helping you line things up in a more balanced, eye-pleasing way.
The grid follows something called the Rule of Thirds—a technique that photographers have used for years to create more interesting, professional-looking shots. It’s not complicated, and once you see how it works, it’ll start to feel natural every time you take a photo.
If you’ve ever felt like your photos look a little off, even when everything is in focus, the grid might be the fix you didn’t know you needed. I’ll show you exactly how the Rule of Thirds works next.

What Is the Rule of Thirds?
If you’re trying to figure out how to take a good photo on iPhone, one of the easiest things you can do is stop putting everything right in the center of the frame. That’s where the Rule of Thirds comes in.
It’s a simple photography trick: imagine your screen divided into nine rectangles by two horizontal lines and two vertical lines. The idea is to line up your subject with those lines—or even better, where the lines cross. That’s it.
Instead of centering your coffee mug, flower, or smiling grandkid, you shift them just a little to the side. And like magic, the photo just looks better. More balanced. More interesting.
The good news? You don’t have to imagine the lines—your iPhone can show them to you. I’ll show you how to turn on the grid next.
How to Turn On the Grid on iPhone
Before you can use the Rule of Thirds, you’ll need to turn on the grid—it’s hidden in your iPhone’s settings, but it only takes a few seconds.
Here’s how to do it:
- Open the Settings app
- Scroll down and tap Camera
- Look for Grid and toggle it on

That’s it! Now when you open your Camera app, you’ll see those faint lines across your screen. Don’t worry—they won’t show up in your actual photo. They’re just there to help you frame the shot better.
Once you’ve got the grid turned on, let me show you how to use it.
How to Use the Grid to Frame a Shot
Once the grid is on, the trick is to line things up with the lines—or even better, the spots where they cross. This is where that Rule of Thirds idea really comes to life.
Here are a few simple ways I use it:
- For people: I try to line up their eyes with the top horizontal line—especially for portraits. It makes the photo feel more balanced without looking too staged.
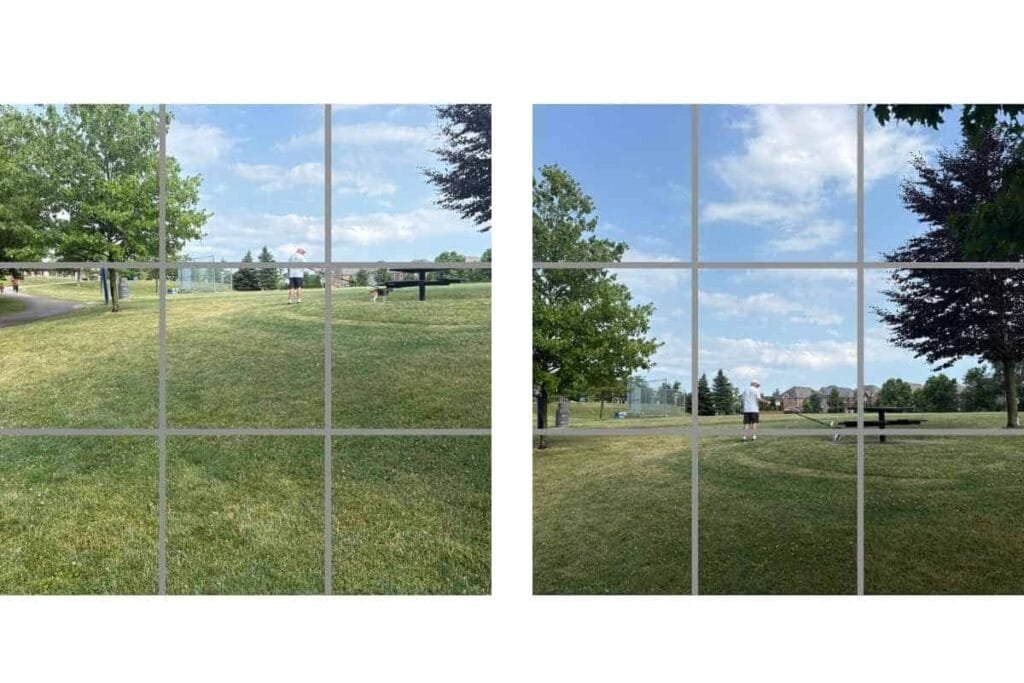
- For landscapes: I line up the horizon with either the top or bottom third of the screen, depending on what I want to emphasize—more sky or more ground.
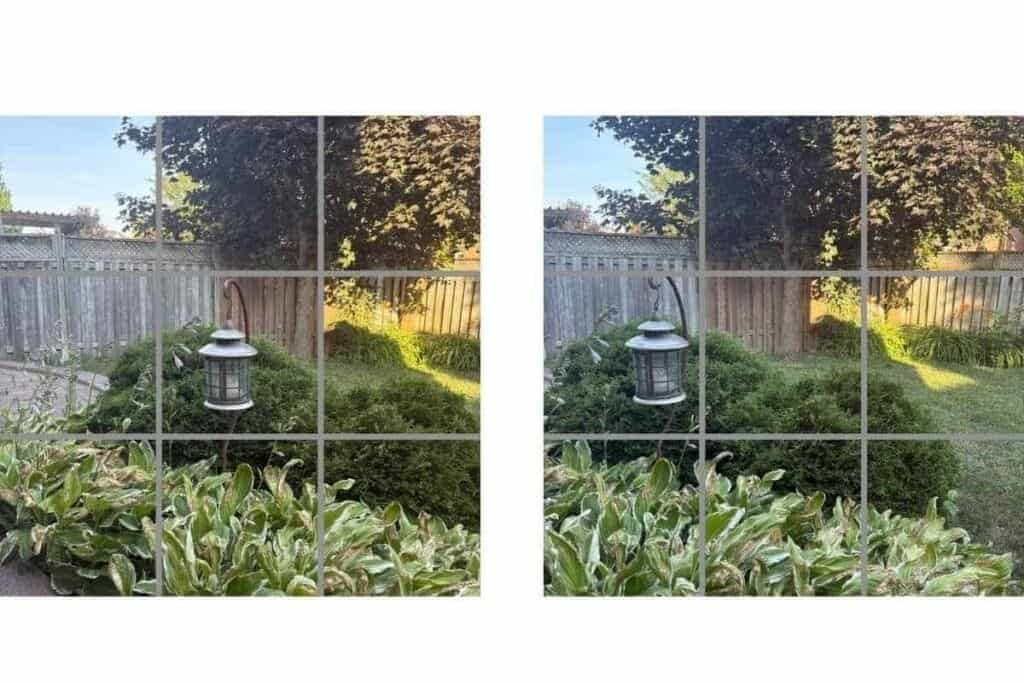
- For objects or close-ups: I move the subject slightly off-center, placing it along one of the vertical lines or near where the lines cross. That little shift can make a big difference.
I used to center everything without thinking about it—but once I started using the grid, my photos felt a lot more natural and intentional.

Extra Framing Tips That Make a Big Difference
Using the grid is a great start, but here are a few more little tricks I use to help frame my photos in a way that feels more polished—without making it complicated.
- Leave a little breathing room: Don’t crop too close to your subject. Leaving a bit of space around them (called negative space) helps the photo feel more relaxed and less crowded.
- Watch your background: Before I snap the photo, I always do a quick scan of what’s behind my subject. A distracting background—like a messy table or a lamp sticking out of someone’s head—can take away from an otherwise great shot.
- Use natural lines to guide the eye: Things like fences, paths, tabletops, or shadows can help lead the viewer’s eye toward the subject. I try to line them up with the grid whenever I can.
- Tilt with intention (or not at all): It’s easy to accidentally tilt your iPhone a little without noticing. Using the grid helps me keep things straight—especially for horizons or anything with strong lines.

These are the small details that start to click the more you practice. You don’t need to use all of them every time, but even just one or two can take your photo from “fine” to “wow!”
Try This: Practice Using the Grid
Want to see the difference the grid can make? Here’s a quick little photo exercise I like to suggest:
Pick something simple around your home—a coffee mug, a plant, or even your dog if they’ll sit still for a second.
- First, take a photo with the subject centered, like most of us naturally do.
- Then, take another photo of the same subject, but this time use the grid and line the subject up along one of the vertical lines, or place it near one of the points where the lines cross.
Now compare the two. You’ll probably notice the second one feels a bit more balanced or “framed”—without you doing much of anything different. That’s the power of the Rule of Thirds in action.
Once you get the hang of it, you might catch yourself using the grid without even thinking about it.

What’s Next?
Using the grid helps with framing—but if you’re still getting blurry or uneven results, don’t worry. In the next tip, I’ll show you an easy way to lock focus and exposure so you can keep improving how to take a good photo on iPhone—no extra gear needed.
👉What’s next? iPhone Photo Tip #4: Lock Focus and Brightness for Better Photos
👈If you missed Tip #2: iPhone Photo Tip #2: Great Low-Light Photos
👈Want to start at the beginning, iPhone Photo Tip #1: Natural Light for Brighter, Better Shots
If you’re planning on practicing your photo skills while on vacation, you might also like my iPhone Tips for Travel—it’s packed with easy ways to get your phone ready for the road and capture great memories while you’re away.
Have a favorite summer photo you’re proud of? Or a moment you wish you’d captured better? Leave a comment or reply—I’d love to hear how you’re using your iPhone with the grid.


