Have you ever noticed that some photos on your iPhone turn out great while others don’t?
For the longest time, I never really thought about why. If something was happening, I’d pull out my iPhone and take a picture because I wanted to capture the moment. Sometimes the photo looked great. Other times… not so much.
Like many people, I assumed better photos came from having a newer iPhone with a better camera. While newer models do have improvements, I eventually realized that simple things like lighting often make a bigger difference than the iPhone itself.
In this series, I’ll share 8 easy tips that can help you take better photos with the iPhone you already have. We’re starting with one of the simplest tips of all: using natural light.
Why Natural Light Helps Your iPhone Take Better Photos
Your iPhone does a lot of the work for you, but it still needs decent lighting to take a good photo. Think about it this way: if you can barely see something, your iPhone camera is going to have a harder time seeing it too.
For years, I didn’t pay much attention to lighting. Like most people, I was more focused on capturing the moment. If something was happening, I pulled out my iPhone and took a picture. And that’s not a bad thing. Some of my favorite photos are candid moments that weren’t planned at all.
But I eventually realized that the photos that turned out best usually had one thing in common: good lighting. When there’s plenty of natural light, your iPhone can capture more detail, better colors, and sharper images. The photo often looks much closer to what you saw with your own eyes.
The good news is that you don’t need to become a photographer to take advantage of this. Simply paying a little attention to the light around you can make a surprising difference.
How to Use Natural Light for Better Photos
Now, before you start worrying that you need to learn photography terms or study the position of the sun, don’t worry. Most of the time, using natural light comes down to one simple thing: noticing the light before you take the picture.
Here are a few easy ways to use natural light to your advantage when taking photos with your iPhone.
Taking Photos Outside
Taking photos outside seems like it should be easy. There’s plenty of light, everyone’s having fun, and you’re trying to capture the moment.
But I’ve learned that bright sunshine isn’t always the best lighting for photos. Some of my least favorite pictures were taken on beautiful sunny days. People are squinting, there are dark shadows on faces, and the photo doesn’t quite capture the moment the way I remember it.
Here’s the thing, you don’t need to wait for a cloudy day to take better photos. A few small adjustments can help:
- Look for open shade. A tree, covered patio, or the shady side of a building can give you softer, more flattering light.
- Avoid having people look directly into the sun. They’ll be more comfortable, and you’ll have a better chance of getting natural smiles.
- If you have a choice, take photos earlier or later in the day. The light is often softer and easier for both people and your iPhone camera.
You don’t have to overthink it. Just take a quick look at the light before you snap the photo. It’s a simple habit that can lead to better results.

Taking Photos Indoors
Indoor photos can be a little trickier because there’s usually less light available.
I can’t tell you how many times I’ve taken a photo at a family gathering, birthday party, or holiday dinner and thought everything looked fine at the time. Then I looked at the photo later and wondered why it seemed darker than I remembered. That’s because our eyes are much better at adjusting to different lighting conditions than your iPhone camera is.
Not to worry, few simple changes can help your iPhone take a better photo:
- Move closer to a window when possible. Natural light coming through a window often makes photos look brighter and more natural.
- Let your iPhone handle the flash automatically. In most cases, it does a pretty good job deciding when it’s needed, and you’ll usually get better results just leaving it alone.
- Face people toward the light. Even a little extra light on a person’s face can make a noticeable difference.
You don’t need perfect lighting to take a good indoor photo. Just being aware of where the light is coming from can help your iPhone capture the moment the way you remember it.

Taking Photos of Food, Flowers, Scenery, and Everyday Things
A lot of the photos we take aren’t of big events. They’re small moments, a plate of food that looks really good, flowers in the garden, a nice view on a walk, or something we just want to remember.
Sometimes those moments look amazing in real life, but the photo doesn’t quite capture it the same way. The colours feel a bit flat, or the scene just doesn’t have the same feeling it had when you were standing there.
Over time, I started noticing something interesting. The same spot could look completely different depending on the light and the time of day. Even a familiar scene can feel warmer, softer, or more vibrant just a few hours apart.
You don’t need to overthink it or wait for perfect conditions. It’s more about noticing when the light feels right in the moment.
A few simple things can help:
- Move yourself or the subject to better light. A few steps can completely change how the photo looks, especially near a window or in open shade.
- Change your angle. Crouch down, step to the side, or shift slightly until the light feels better on your subject. This is one of my favorite things to do!
- Pay attention to the light and timing. If something looks especially nice, it’s often worth taking the photo right then rather than later.

You don’t need anything fancy. Most of the time, it’s just slowing down for a second and noticing what the light is doing before you tap.
Of course, real life doesn’t always cooperate. Sometimes you’re trying to capture a moment and don’t have the luxury of moving to a better spot or waiting for better light.
When that happens, your iPhone has a simple tool that can help.
Let Your iPhone Change the Light
Moving into the shade isn’t always an option. Sometimes you’re at an event, watching a game, or taking a quick photo while you’re out and about. The light is what it is, and you don’t have time to find the perfect spot.
In those situations, here’s a simple iPhone trick that can help. Before taking the photo, tap on the main subject on your screen. Your iPhone will focus on that area and adjust the lighting for it.
If the photo still looks too bright, you’ll see a small sun icon appear beside the focus box. Slide your finger down to slightly darken the image before taking the picture.
I use this most often on bright sunny days when parts of a photo look washed out. It only takes a second and can help you capture more of the detail you’re seeing with your own eyes.

It won’t fix every lighting challenge, but it’s a handy trick to know when you can’t change where you’re standing.
Try It Today
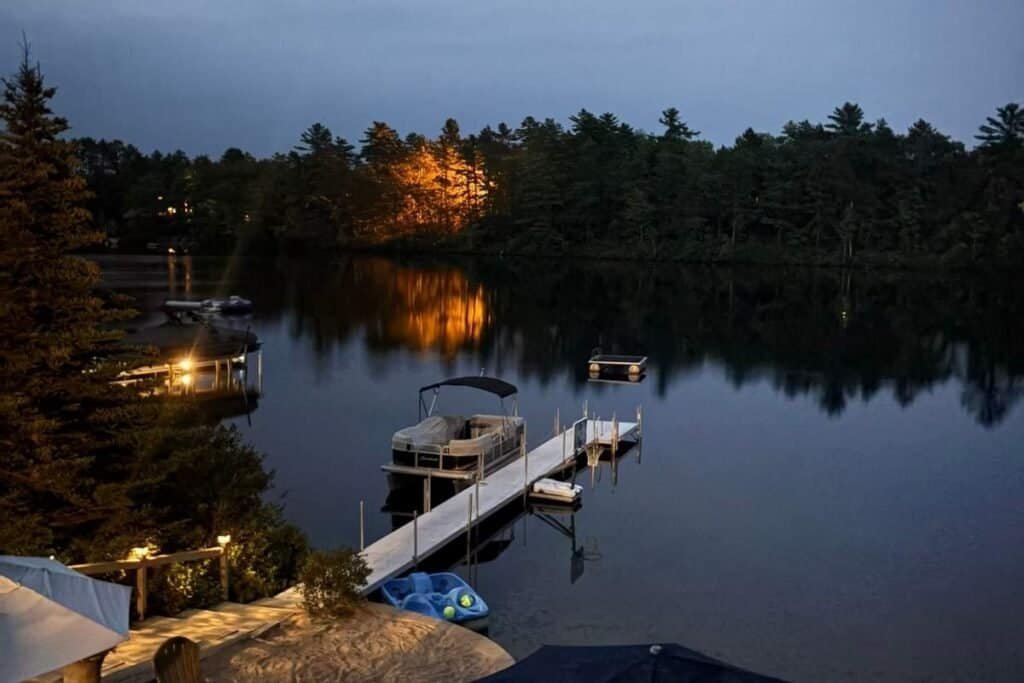
These two photos are a good example of how lighting can affect your iPhone photos.
When I took the first photo, I was trying to capture the waterfall and rocks behind us. It was a beautiful spot, but the bright sun wasn’t doing us any favors. Even with sunglasses on, we’re both squinting and the shadows on our faces are much harsher.
A few minutes later, we moved into the shade and I took another photo. The scenery was still there, but the softer light made a big difference. Our faces look more relaxed, and I think it’s the better photo.
The next time you’re taking photos with your iPhone, try looking at the light before you take the picture. If the photo doesn’t turn out the way you hoped, move a few steps and try again.
Sometimes a small change in lighting can make a bigger difference than upgrading to a newer iPhone.

What’s Next?
Natural light can help your iPhone take better photos, but let’s be honest—many of life’s best moments don’t happen in perfect lighting.
Birthday dinners, evening walks, concerts, holiday gatherings, and photos around the campfire often happen after the sun goes down.
In the next tip, I’ll share a few simple ways to get better low-light photos with your iPhone.
👉iPhone Photo Tip #2: Great Low-Light Photos
Summer’s full of little moments you’ll want to remember—whether you’re hanging out in the backyard or heading off on a trip. If you’re planning a trip, don’t miss my post on iPhone Tips for Travel to help you get your camera roll organized and ready for photos on the go.

Gail Kerr
IT Professional and Technical WriterTechnology has been part of my life for as long as I can remember. With over 28 years of experience providing computer support in both large corporations and small businesses, I’ve seen just about everything. In 2009, I went back to school to earn an Associate Certificate in Technical Writing—combining my love of tech with a passion for clear, easy-to-understand communication. Now, I help people of all levels feel more confident with their devices. I’ve also become the go-to person for friends and family whenever a tech question or challenge comes up.